PHOTOSHOP AND DIGITAL TRUTH: BEFORE AND AFTER
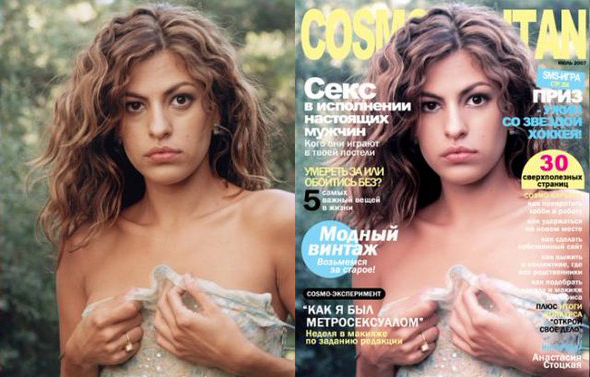
Every image in every magazine is tweaked and manipulated. Your job is to turn the technology onto yourselves.
Your will create a "before" and "after" photograph of yourself...the "before" being the original digital photo, taken a smartphone, and the "after" being the photo digitally manipulated in Photoshop to reveal our culture's hegemonic beauty ideals that none of us will ever live up to. Here's the 7-step process you'll go through.
1. Take a high quality photo of yourself (headshot, meaning shoulders and head) making sure to use really good light. (NOTE: The light should be ON YOUR FACE....). Come to Bettina if you need help in this area.
2. Open the photograph in Photoshop (File/Open) and duplicate the photo (Image/Duplicate) so you'll have two versions (before and after). You'll be working on the duplicate.
3. Access LINKEDIN LEARNING (using your CAT ID) and watch portions of the LYNDA Tutorial, "Learning Photoshop Portrait ReTouching." Choose at least two of five of the 20-minute chapters, watch the chapter, and then apply the skills to your own face:
Ch. 3: Shape, Sculpt, and Modify
Ch. 4: Improve Skin
Ch. 5: Remove Shadows and Wrinkles
Ch. 6:Improve Eyes
Ch. 7: Whiten Teeth and Change Makeup
4. According to the new skills you have learned, transform your face in accordance to the unttainable beauty standards we have come to expect from magazines. For example, use the Patch tool to remove all "blemishes"; the Healing Brush to smooth your skin; the Clone Stamp tool to deal with flyaway hairs; the Filter/Sharpen/Smart Sharpen to sharpen your eyes; Adjustments/Curves to alter your eye and lip color; Liquify (Filter/Liquify) to tweek the shape of your cheeks, nose, chin, eyes, lips, etc., but BE CAREFUL, Liquify is a powerful tool and is irreversible. Make sure that there is a clear difference between the "before" and "after" photos.
- Use the facilities in Rod Library's Digital Media Hub...people at the Hub should be able to give you help if you need it.
Pointers:
- Don't forget to "unlock" the image you're working on: double click in the "Layers" area OR go to the Main menu and select Layer/New/Layer from Background (and click "ok")
- Keep the layer panel open at all times and work in separate layers.
- A gotcha: If you have something selected (you can tell if there's little marquee-like dashes around an area), then you have to DE-SELECT in order to make changes with the healing brush, etc. Click Control D or Command D (Mac) to de-select.
- Lynda is the greatest resource.
5. When you're done with your two images, Export each of them as Jpg files (File/Save As/Jpg) put them side by side in a Google Doc and hand them into elearning. We'll look at them in class on the day they're due.
You will be graded on the extent with which you meet all criteria of this assignment and your level of ambition.