|
Flash |
|
|
Flash |
Introduction
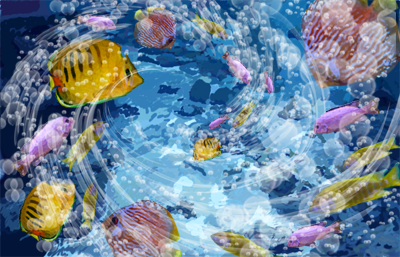
Flash is Macromedia's powerful vector-based animation tool. Flash is the defacto standard for Internet multimedia because it allows authors to create online multimedia presentations with minimum file sizes. With Flash, Web presentations can blend text and pictures with video and audio, interactive buttons, and animated charts and graphs.
Flash is also becoming a rich ground for multimedia because its interactivity lends itself as a medium to non-linear, reader-directed storytelling.
While Flash is used on the most advanced Internet media sites, basic uses, like generating animated slideshows and animating objects, are fairly easy to learn.
First we are going to look at basic shape drawing and animation tools and the workspace.
This tutorial was written for Flash CS4, so some of the procedures we describe may be slightly different if you have a newer version of Flash.
Getting Started: The Work Area
Launching Flash will load the work area page. The work area has the follow ing main sections: the stage, the timeline, the properties, the tools, and the library.
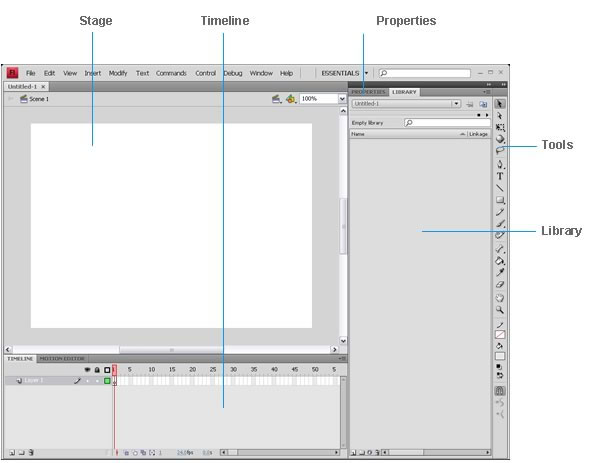
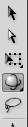
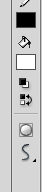
Tools
Selection tools Arrow
· Subselection
· Lasso
Drawing tools
· Pen
· Line
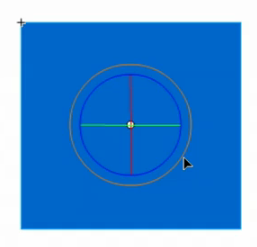
· Oval
· Text
· Rectangle
· Brush
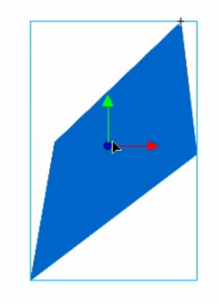
Transforming tools
· Transform
· Fill
· Inkbottle
· Paintbucket
YOUR BEST FRIEND = Command Z (this erases your previous move)
CLARIFICATION:
A movie is your Flash project, whether a slide show of still photos or bouncing balls, as opposed to a video clip that you might edit in Adobe Premiere and embed in a Flash movie.
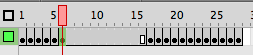
Timeline
It’s divided into frames, like a video or animation, with 12 frames per second being the default [but change it to at least 15]. The rectangular red box is the playhead that you move to see changes on the Stage. Play your movie by hitting "Return"
When the Timeline opens:
· It displays one layer with hundreds of little boxes.
· Each box corresponds to a single frame.
· You can make those frames bigger or smaller by clicking the pop-up box at the end of the line of frame numbers (it has what looks like a little Frankenstein scar).
· In the single layer, the first box is outlined in black and contains an empty circle. That first box is a blank keyframe.
· The rest of the boxes are outlined in gray. Boxes with gray outlines are called “protoframes” – they’re placeholders. Every fifth protoframe is tinted gray; the rest are white.
· A frame with an empty circle means it is a blank keyframe with nothing in it. Put something in it, and the empty circle changes to a black circle, which indicates a keyframe.
5 FOUNDATION SKILLS
1. Animating with F6, F5, and F7
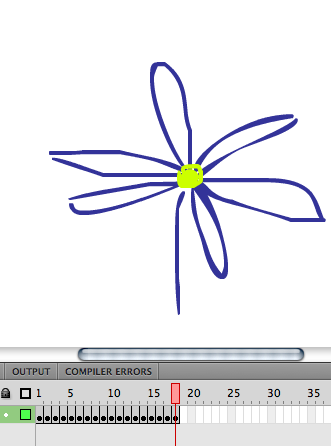
Using a Paint brush, draw the stem of a flower.
F6: Then press "F6" and keep on drawing petals, entering "F6" before every stroke.
F6 copies whatever information you have on the previous key.

|
|

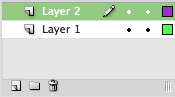
2. Layers

3. Motion Tweening with Keyframes
There are frames and then there are keyframes. A keyframe signifies the beginnings and ends of changes in an image. Keyframes have black dots in them. In Flash, you mark a frame as a keyframe when you want to start or end a change. Think of keyframes as the brackets, the starts and stops, the beginnings and ends – of a motion, a fade in or fade out, a size increase or size decrease, etc. When you set two keyframes – one when a fade starts, another when it ends, Flash does its magic and figures out the middle, the inbetween part. This is called TWEENING.
Hit Return and watch your movie.
Now create a new layer.
File/Import the bee.png file (Import to Stage).
Create a motion tween with the bee.
Some more important rules:
ONLY ONE SYMBOL ON A LAYER. That means that if you’re moving one symbol on a layer, you can’t add a symbol to a layer that already has a symbol and make it move independently of the symbol that was there first.
The truth about instances
Flash really works with INSTANCES of symbols. Instances is what you call a symbol after you’ve dragged it onto the Stage. Why is this important? Because you can do anything you want to this instance – shrink it, stretch it, make it disappear – and it doesn’t do anything to the symbol from which it came. Which means you can use the symbol as many times as you want.
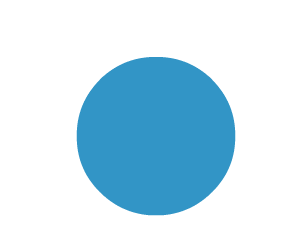
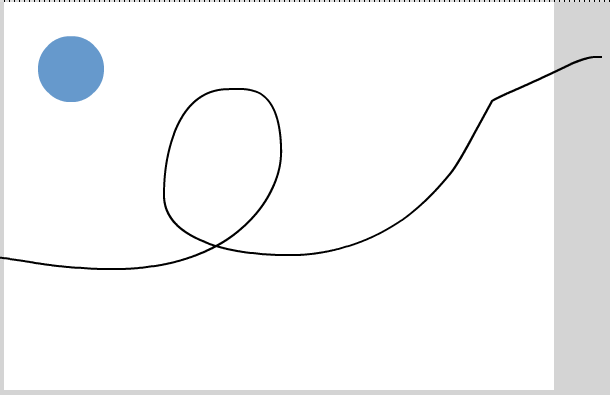
4. Shape Tweens. Turn a circle into a star.
Shape tweens are fun because they look really cool and they’re easy to create. Compared to motion tweens, they look more dynamic because every attribute – including the shape – animates.
In shape tweening, you draw a vector shape at one specific frame in the Timeline, and change that shape or draw another shape at another specific frame. Flash then interpolates the intermediate shapes for the frames in between, creating the animation of one shape morphing into another.
Shape tweens work best with simple shapes. Avoid shapes with cutouts or negative spaces in them. Experiment with the shapes you want to use to determine the results. You can use shape hints to tell Flash which points on the beginning shape should correspond to specific points on the end shape.
You should now have a keyframe in frame 1 with a square and a keyframe in frame 30 with a circle.

Flash interpolates the shapes in all the frames between the two keyframes.
Preview the animation by pressing the Enter key.

Tip: Flash is really unforgiving when you don’t follow its rules. Luckily, the rules for a shape tween are very simple: no groups and no symbols. That’s it. Remember these two things, and shape tweens will be easy. Also, Text acts as if it is a grouped or a Drawing Object from the beginning. This means that you can’t use text in a shape tween unless you first break it apart (by selecting Modify, Break Apart). If text contains more than one character, you have to break apart twice – once to break the text into individual characters and another to turn it into individual shapes. Remember, too, that after text becomes a shape it is no longer editable!
Some Tips:
If you ignore all other tips, keeping it simple is the one you really should remember. There are few rules for a shape tween. However, when you have a million different shapes tweening to a million other shapes, the results will look random. The two symptoms that you aren’t keeping it simple are unexpected results and the ‘checkerboard’ effect.
For example, consider these unexpected results. You imagined your name morphing gradually into a circle shape, but despite breaking apart the text you got a mess. Or you go the checkerboard effect in the tweened areas. These are signs that you are creating something too complicated for Flash. So do one thing at a time. For example, try to tween just one letter of your name into a circle.
It's easy to fall in love with the shape tween. There's nothing like it. Feel free to use it when necessary. However, because shape tweens are inherently less efficient and harder to produce than motion tweens (the file sizes are larger and play more slowly), you should always choose motion tweening when you can. If you can get the same effect with either, you should always opt for motion tweening.
Let's say you have a shape you want to tween from a blue circle to a red square. Only a shape tween will suffice because the actual shape is changing. However, if you just want to tween a blue circle into a red circle, you're much better off doing it as a motion tween. Draw a circle, convert it to a symbol, insert a keyframe later in the Timeline, use the Properties panel to set Color Effect to tint the circle instance in the second keyframe, and set Tween to Motion when you select the first keyframe. To do the same animation as a shape tween, you would draw a circle (don't convert it to a symbol), insert a keyframe later in the Timeline, fill the circle in the second keyframe with a new color (perhaps using the Bucket tool), and set shape tweening in the first keyframe. The result of each operation is the same, but the motion tween method is better because it gives you only one master version of the circle and therefore a smaller file size.
Sometimes it's obvious which type of tween is more appropriate. If something's just moving or changing color, a motion tween is appropriate, whereas significant changes to a shape require the shape tween. Sometimes, however, it's not so obvious. For example, you can drastically change a symbol's shape by using the Free Transform tool's Rotate, Scale, and (especially) Skew options. Plus, tweening the properties of a Filter (using Motion Tween) can have a huge impact.
To control more complex or improbable shape changes, you can use shape hints. Shape hints identify points that should correspond in starting and ending shapes. For example, if you are tweening a drawing of a face as it changes expression, you can use a shape hint to mark each eye. Then, instead of the face becoming an amorphous tangle while the shape change takes place, each eye remains recognizable and changes separately during the shift.

Shape hints contain letters (a through z) for identifying which points correspond in the starting and ending shapes. You can use up to 26 shape hints.
Shape hints are yellow in a starting keyframe, green in an ending keyframe, and red when not on a curve.
For best results when tweening shapes, follow these guidelines:
In complex shape tweening, create intermediate shapes and tween them instead of just defining a starting and ending shape.
Make sure that shape hints are logical. For example, if you’re using three shape hints for a triangle, they must be in the same order on the original triangle and on the triangle to be tweened. The order cannot be abc in the first keyframe and acb in the second.
Shape hints work best if you place them in counterclockwise order beginning at the top-left corner of the shape.
 Select View > Show Shape Hints. The layer and keyframe that contain shape hints must be active for Show Shape Hints to be available.
1. Motion Guides
Create a motion tween (use a ball for starters).
Use the subselection tool (white arrow), click on the end of the motion path, and move the Bezier curve handles....click them and drag them around.
Above are a bunch of .gif files (all doggies, I'm afraid), which you'll have to convert to SYMBOLS (either Movie or Graphic, NOT Button) for a slightly more complex path.
Go back (Control Z) to the point before you made the motion path.
Use the Pencil Tool. Click it to "Smooth" (bottom of toolbar--if you don't see it, grab the bottom of the toolbar to reveal the necessary tools).
2. Movie Clips
The first time someone builds a complex Flash project, the Timeline stretches out forever and becomes very difficult to work with. At some point in the authoring process, the designer may discover Scenes and try using those to manage the huge, unwieldy sequence of frames. However, scenes don’t make the Timeline more compact; they only break it up, the way a book is broken up into chapters. What works much better is to use movie clips for any motion or action that must be repeated or that must remain available to the user.
Movie clips are a type of symbol in Flash (the three types are graphic, button, and movie clip). They act like mini-movies inside the main movie, so they can play parallel to (or simultaneously with) other parts of the movie. With movie clips, a Flash movie that had 100 or more frames could be pared down to as little as one frame!
Some people wrongly think that Graphic symbols are only for when the symbol contains a single frame and Movie Clip symbols are only for when you have multiple frames. The differences go much deeper than that. The best approach is to always use Movie Clips unless you have a reason to use Graphic symbols. The first thing to learn is that both Movie Clips and Graphic symbols can contain one or more frames. However, only Movie Clips will automatically loop regardless of where you place instances of that clip.
Movie clips offer incredible versatility to a Flash designer, and yet it takes some practice before working with them begins to feel comfortable. After you figure out how useful they are, you will begin to realize that almost every cool thing you’ve ever seen in a Flash movie was done with movie clips. They really are worth the effort.
Start with a new Flash document and change your frame rate to 24 fps.
Create a shape, or import a graphic (the bee.png for example!) and convert to symbol (F8).
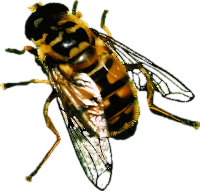

Double click on the bee symbol on the stage. You'll know it's a symbol by its blue outline.
You're now in Movie Clip Editing Mode--you'll know by the blue arrow in the upper left hand corner of the screen:


3. Importing Movies into Flash