Homework
Read the following carefully and come to class with your index.html webpage with three images inserted into a table. See if you can figure out how to insert a ROLLOVER image.
Add a biographical paragraph about yourself, complete with additional spaces and a
line break.
Defining
a Site
First,
on your computer, create a new folder and name it YOUR NAME (e.g., Bettina Web
Folder).
Next
create 3 more folders within that first folder:
- documents
- images
- video
- flash
Make
sure all the names are lower case.
You’re
going to want to work with this site in DW, therefore you need to tell DW where
this site is. If you end up moving website files to another computer, you'll
need to define the site on the new computer. But if you stick with this particular computer, this is the
only time you'll need to "Define the Site."
1.
To define the site, go to the DW start page, and click on the "Dreamweaver
Site" link under the “create New” column.
At the top of the window you'll see basic
tab an advanced
tab.
Use advanced tab (don’t let advanced scare you). When you define a site, you’ll be working with it on your
own computer. When you work on
your own computer, you’re working “locally.” When you’re working with files on your web server, you’re
working “remotely.” Make sure your
Local Info category is selected.
You'll
see 2 very important fields:
"Site Name" and "Local root folder."
Site
Name: the name you enter here
is for your computer only. It
doesn’t have anything to do with website; so give site a name that makes sense
to you. If you were working
on a site about New Jersey waste management, you’d name it NJwaste.
Local
root folder: So now you have
to tell DW where the site is.
Browse for it by clicking the folder icon. Find the folder.
Make sure you select the entire folder for your site. That’s all you
have to do to get started.
Other
things in local info category:
You
already have created an "images" folder so you don't need a default
one!
Http://
field: Here is where you put in
the web address you will end up having.
You
should put: http://www.uni.edu/username
Case-sensitive
links field: you should know ONLY
TO USE lower case letters, so this shouldn’t be a problem.
Cache: Enable cache…..don't worry about this, we will address this
later.
DW becomes a conduit through which you
can interact with the folder on your desk top.
CLICK OK
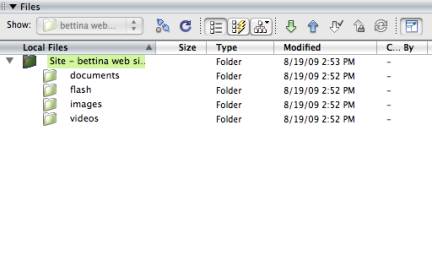
File
and folder management
Once
you’re site is defined, you can access the folders you created in Dreamweaver's
File folder. Go to Windows/Files
(or select F8)
You're
going to come here OFTEN so get used to it!
If
you decide to delete or change a file, you’re going want to do as much of this,
"file management" as possible from the Files panel. Avoid making any changes from the
Windows or mac interface itself.
Moving files is a big no-no unless you want the hassle of fixing broken
links. Make all changes within
DW. You can create new file
folders, etc. and you can easily add them to your local computer.
To
create new webpages within the site, select File/New and create it within
DW/File management system.
You
can see the contents of your folder in the File panel:
Adding
images onto your webpage:
There’s
going to be times where you’re going to want to bring in images that are
outside the root folder, like on a USB drive or something.
To
use them, you need to move them into the Root folder.
- Find three photos online, make
sure they are JPGs, and bring them into your local "Images"
folder on your computer.
Dreamweaver copies the automatically into its Dreamweaver Files
folder (to check, go to Window/Files and you'll see the images there!)
Here are 2
- There are three ways to insert
an image.
- You can also drag an image from
the Files Folder directly onto your site.
- You can
choose Insert/Image and choose an image from the Files Folder.
- You can
select the little "tree" icon on the top menu and add an image
that way.
TRY
ALL THREE METHODS multiple times.
Creating
and saving a new document
3 ways to do this.
1.
preferred
method!!
Right
click Windows/Control Click Mac, on the main site folder and choose “New
File”. DW generates a new
page. Create it as Index.html, and
off you go. It saves a couple of steps, it’s automatically saved in root
folder. Fastest way to create a
new page.
2. On start page, click on “HTML” to
generate a new page. DW opened a brand new fresh page. But the issue here is
that it’s not yet saved, and in the right place. Whenever you create a page in this method, you have to SAVE
IT IMMEDIATELY. That way DW will
know exactly where it should go. File/Save, and save it in the local root
folder. It should automatically
display local root folder, but always double check.
Since
you should always give your page a title, don’t forget to do that asap. Give it
a good descriptive title.
3.
Select File/New.
Gives you all sorts of options as well as templates. Again, you’ll get a blank
document. Save it right away. You can even create a new folder in
which to save the file.
As
long as everything is in your main folder, you can have as many sub folders as
you’d like.
Assets
panel
Very
important panel, you’ll find it in the files panel group. A catalogue of all the different
images, colors, links, templates, library items…things you might be using in
DW, and this panel is like a one-stop shop to find access to all these
different things that you’ll continue to use.
The
panel is broken down into several different categories. When you open DW, it automatically
scans your site and finds stuff to put into the appropriate categories. So you can have immediate access to
them. If you start adding
different colors to your site, you’ll see the colors there. You never need to manually add assets
to your assets panel.
Occasionally
you might need to hit the refresh button to give it the most current listing,
but DW does add assets automatically.
With
each image selected you can see a preview of what each image looks like. So it’s good to use the assets panel
for previewing images before you bring them into your site.
You
also may want to take advantage of your ”Favorites” category….store all of your
most commonly used images. Instead
of having to hunt through all of your images, stick a few in your favorites
category. (The little purple
button at the bottom right corner of the Assets folder).
![]() When you go into
to Favorites window the little purple button will have a minus sign next to it
so you can remove favorite images.
When you go into
to Favorites window the little purple button will have a minus sign next to it
so you can remove favorite images.
Inserting
images
Several
different ways to do this.
- Preferred method!!
Add an image to the page using the assets
panel. Select image in assets
panel and drag it onto your page.
You’ll see the Image Tag Accessibility Attributes window pop up. This will happen every time you add an
image to your page. Accessiblity
is a major concern when it comes to web design. It’s about making your page as accessible as possible for
people with vision disabilities and to people who will be viewing on smaller
browsers (a phone or PDA, for example).
Here you can put an alternate TEXT in replace of the image, so that
people who are using screen readers (or audible readers), which read the text
of a webpage to a person out loud, can know what the image is about. You can
have this window not come up if you want to by changing your preferences. If you know what image you want you can
make real quick work at this.
- Use the Files panel. You can drag images from the files, however, you don’t
see a preview of the image, so you have to know the name of the image.
- Use Insert bar.
 choose picture with the little tree
on it.
choose picture with the little tree
on it.
That takes you to a dialogue box that allows you
to hunt for the images that you’ll use. You can get a preview of the
image. If you don’t see it, make
sure you have “preview images” checked.
Problem here is there is a lot of unnecessary clicking. Much easier to go to the assets panel,
find image you want, and drag it in.
When
you go between Design and Code, whatever is highlighted in code is whatever you
happen to be working with.
<p><img
src=“images/header-top.gif” width=”720” height=”58”/>
This
is what is known as a relative path.
Meaning this path is relative to the page in which it appears. If you switch to your files panel, this
is what the path means: In
the main root folder, look for the folder called images and in that folder look
for the image that has the name “header-top-gif”
An
Absolute path is when you give the exact address of a file regardless to the
relationship of the page it’s on.
In most cases it’s not necessary to give an absolute path unless you’re
linking to a website other than your own.
Accessiblity means many different
things: a person with vision disabilities
or a person wanting to access a webpage on a mobile phone. Some people will
still surf with their images turned off so things will go faster. By providing alternative texts you can
help people out who want to, for example, go faster and search using their
phone. In Properties Box for the Images, there’s a little area across the top
layer of the box labeled “Alt” and it’s here where you can name your images.
Inserting
text
Text is the most common
kind of content. Not much to show
you here. A lot like working w/ a
word processer. Type whenever you
see a flashing cursor.
Add a Space: If you want to put space between words, you CAN’T
HIT THE SPACE BAR MORE THAN ONCE.
HTML only recognizes one line of space. If you want to add space, you
can insert non-working spaces or use CSS to control the position of texts. To
add more than one space between characters, you can press CTRL+Shift+Spacebar
or you can insert the "Non-Breaking Space" character by choosing the
Insert menu, HTML, Special Characters and then choosing NON-Breaking Space.
Add
a Line Break: When you press ENTER
after another line of text, there is an awkward space between the new line and
the old line. It’s a Paragraph break.
You can control this to some extent if you’re working with CSS. But what if you’re typing an address
and you want the town on the very next line. Instead of a Par. Break you need a LINE break. To insert a linebreak, hold down
Shift on the keyboard and then press return. (in code this will be represented by
<br /> )
If
you go into the code view, this is a really great way to learn the basics of
HTML.
Aligning
text and images
Default
for alignment: Everything will be aligned to the LEFThand side of the
page. You can center by putting
cursor on an image or in a line of text, and choose one of these ![]() and it will center, align right, etc.
and it will center, align right, etc.
Page
properties
You
find Page Properties by going Modify/Page Properties or going Control J (windows) Command J (Mac). Remember this key command, b/c you’ll
use it often. If you’re not going to use CSS, you can use Page Properties
instead (just go to Edit/Preferences to turn off the CSS default option). You can apply a background color
here.
Using
meta tags
When
you insert metatags you make it much easier for search engine robots to
understand how to categorize your site.
How do you add this information?
They only appear in the HTML code, not in the document body whatsoever. Go to INSERT bar and switch to the HTML
category. Concern yourself with
the Head button and select Keywords. It’ll open up a Keywords dialogue box
Keywords reflect the content of
the page. Pick words that any
person would type in to Google or Yahoo to find your site. Separate each word
with comma and space: tea, tea stores,
brewing, green tea (etc). Don’t go
too overboard. A lot of search
engines limit the keywords you can use, and will just pass you over.
Another
type of metatag is a “Site Description” which will describe site when it comes
up in your website listing. If you
don’t do this, it’ll take the text off the first few lines of the body of the
text itself. Keep it short and
sweet. In the code, these changes will be marked by “meta” You CAN add a series
of keywords to every single one of your pages, but most of the time people just
do this to the front page of your site.